
The saying “Buy it for Life” is all about buying durable, high-quality products that stand the test of time. But did you know you can also buy plants for life?
That’s right – you can multiply your plants without ever buying another one!
In this blog post we’ll introduce you to the concept of plant propagation so you can make all your green dreams come true!

This post may contain affiliate links. This means if you purchase through these links, I may earn a small commission, at no extra cost to you. I only recommend products that I personally use and trust, which is why not all the links are affiliated. Your support helps me keep this blog running and allows me to continue creating helpful content. Thank you for your support!
What is Plant Propagation?
Propagation is a fancy term for making new plants from your old plants. It’s like creating an identical twin, if you will, because both plants will have the same genetics. There are different ways to propagate plants, and different plants accept different methods. This post is going to discuss propagating using water.
A Note on Plant Selection
Not all plants can be propagated using water. According to http://www.myplantin.com, the following types of plants propagate in water very well:
- Tropical vines such as pothos, philodendron, and monstera
- Ficuses (fiddle-leaf figs, ginseng ficus), money trees, dracaenas, hibiscus, and citrus
- Herbaceous plants such as croton, African violets, begonia, perperomia, string of pearls, mint, basil, tomato, lavender, and rosemary.
Many of the very beautiful plants listed above are toxic to cats, so be careful with your choice if you have a furry friend at home. This post showcases photos and details from my propagation of a cupid peperomia which is very similar to pothos, but non-toxic! I would highly recommend it!

Materials Needed
- A plant you want to clone (or a cutting)
- A sharp knife or pruner to make your cutting
- A small, glass jar (8 oz mason jar recommended)
- A small pot
- Soil mix appropriate for your plant selection
- Optional: Root growth hormone
- Patience
How to Propagate Plants Using Water
Step 1: Get a Cutting of the Plant You Want to Propagate
In order to clone or multiply your plant, you need a cutting from that plant. A cutting is simply a piece you have cut off the plant which has the potential to grow into a brand new plant. To ensure it will grow, you need to cut this piece in the right spot, just below the node. The node is where the leaf attaches to the stem. Cut below the node about a quarter of an inch with a clean, sharp knife.
Perspective is Everything: If you are making a cutting from a trailing plant, and the plant is trailing down, you’ll want to cut above the node. Basically, you want to ensure the bottom of your cutting is a node because roots grow more easily here. You can have more than one node on your cutting.
Note – if you don’t already have the plant, you can either buy the plant and cut off a piece per the above to start your second, or you can buy a cutting to propagate the first plant yourself. For my first peperomia, I bought a cutting from someone on Etsy and followed the steps below. Then I was able to propagate again from that one.

Step 2: Prepare Your Cutting
Now that you have a cutting, you need to prepare it for optimum rooting. This involves removing any leaves that would end up in water (based on the size of your jar).
Step 3: Prepare Your Jar of Water
Propagating using water is the easiest way to root your plant! (Rooting means that roots have grown from the plant.)
Take a clean, small mason jar, about 8 oz, or other similar vessel, and fill it with room temperature water. Place your cutting into the jar, ensuring no leaves enter the water.
Optionally, you can dip the node into rooting hormone before placing it into the water.
Place your jar and cutting in a place with bright, indirect sunlight. I’ve had success placing them in an east-facing windowsill.
Step 4: Check On Your Cutting and Replace Water Every Few Days
This is where patience comes in. Your cutting is not going to grow roots overnight. This will take some time, more time depending on the season and how much daylight it gets.
Every few days, check on the cutting to give it fresh, room temperature water, and see how the roots are growing.


Step 5: Transplant into Soil
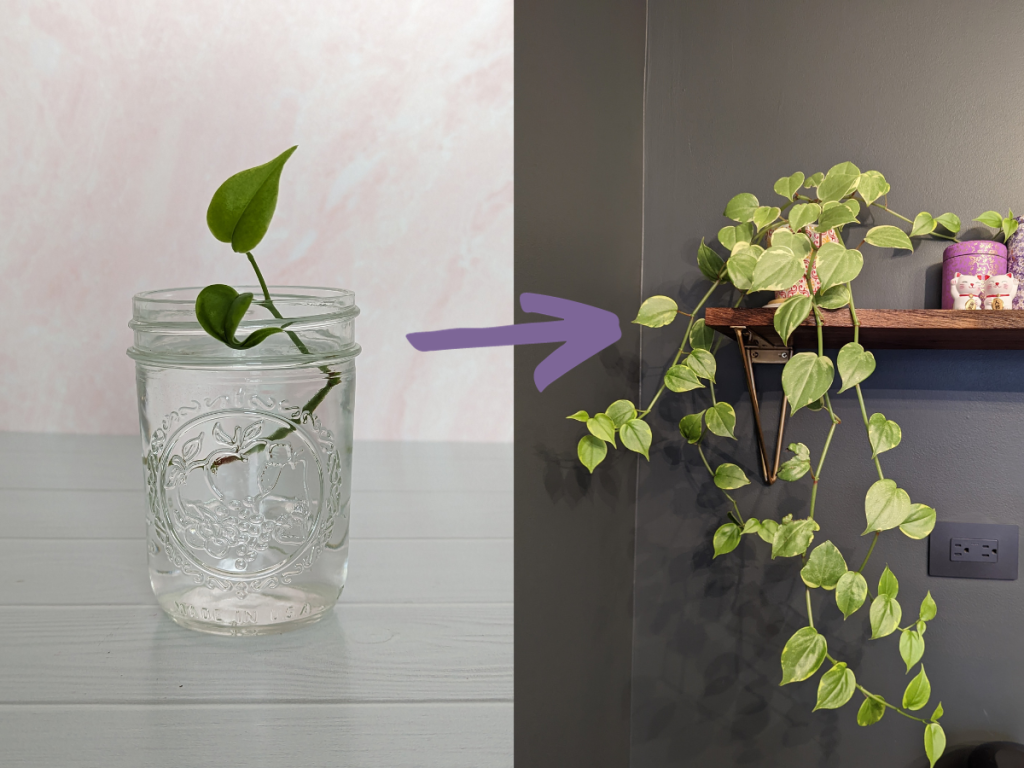
Once the roots are long enough, an inch or longer, you can transplant the cutting into soil for continued growth. It could take up to around 6 weeks to get to this point. Be sure you use a potting mix that is appropriate for the type of plant you have. For my cupid peperomia, I needed to mix some perlite and orchid bark into the potting soil for optimum drainage. Depending on the plant, you may need to repot when it grows larger so you don’t stunt its growth.

Step 6: Rinse & Repeat
Follow these steps for every plant you want to propagate. Your original plant will regrow from where you cut it so you can continue to cut from the same spot or different spots. You can even cut off multiple cuttings at one time and start your own little propagation factory :).
Giving this a try? Let me know how it goes in the comments below or in our Facebook group! The Purple Door Group on Facebook is your doorway to a vibrant and supportive community of like-minded individuals who are passionate about creativity, home decor, DIY projects, food/drink, crafts, and all things lifestyle.

Leave a comment